Really Easy Wonder Book Diorama With Steps

For today's fun fold hop, meet the Wildlife Wonder Diorama card. It is the size of a traditional A2 card, yet has the qualities of a great 3D diorama.

I am in love with this card! My good friend Carole sent me a diorama card last year and I was just dying to CASE it. Her card was so pretty and the 3D element really drew me in. So, when I saw this big bear from Wildlife Wonder, I just knew this was the perfect time to do it.
There are quite a few elements in this card, but it's relatively easy to make. The base is from one of the white cardboard pieces found in a pack of DSP (designer series paper). It's a little thicker than DSP, so it makes it nice and sturdy. The complete list of the other supplies used can be found below.

To make the card
- Begin by cutting the thin white cardboard from one of the packages of your Stampin' Up! DSP (designer series paper). You will need two pieces, each measuring 4 1/4″ x 7 1/2″. (hint – Cut the cardboard with the writing facing up. Make a cut at the 4 1/4″ mark and at the 7 3/4″ mark, then trim to equal 7 1/2″ each. This will ensure that you do not get any of the writing on your card.)

- Score both pieces of cardboard at 1/2″, 1″, 6 1/2″, and 7″ and burnish with your Bone Folder.
- Using the Stitched Rectangle dies, crop the following: one of the cardboard pieces with the 3rd largest rectangle, a 4 1/4″ x 5 1/2″ piece of In Good Taste DSP with the 2nd largest die, and a piece of Basic White cardstock with the 4th largest die, using your Stampin' Cut & Emboss machine.
- Adhere the In Good Taste DSP to the outside of the cardboard you just cropped using Multipurpose Liquid glue. (hint – the Multipurpose Liquid glue will give you a little wiggle room if you place it on wrong. You can move it a bit before the glue dries.)
- Cut two pieces of Early Espresso cardstock measuring 1/2″ x 4 1/4″ and adhere them to the small side tabs of the cardboard using Multipurpose Liquid glue.
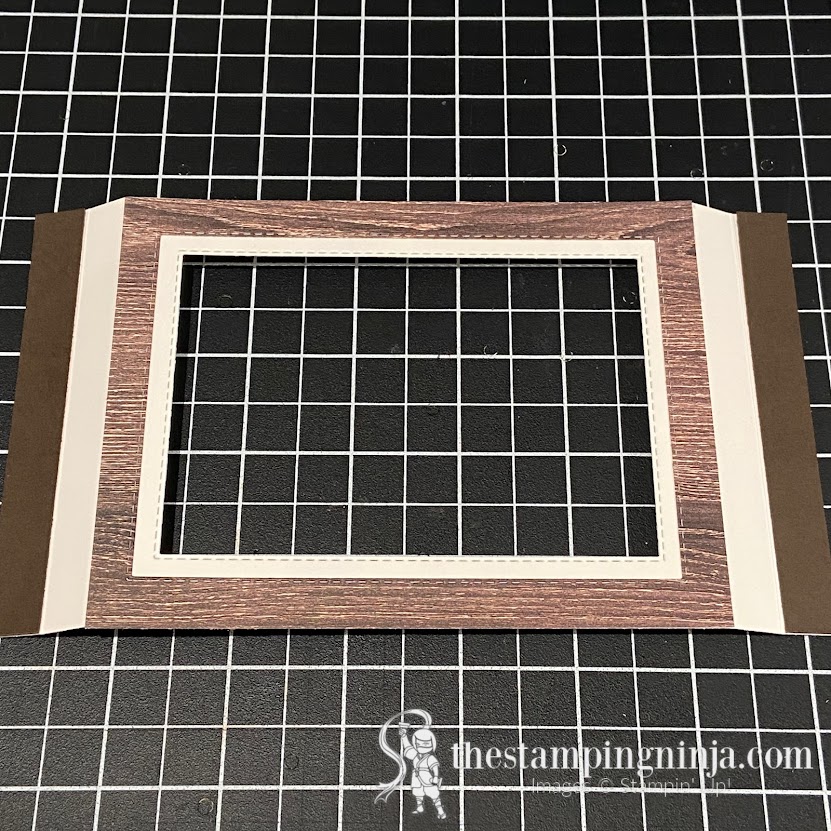
- Adhere a 4 1/4″ x 5 7/16″ piece of New Horizons DSP to the inside of the other cardboard piece using Multipurpose Liquid Glue.
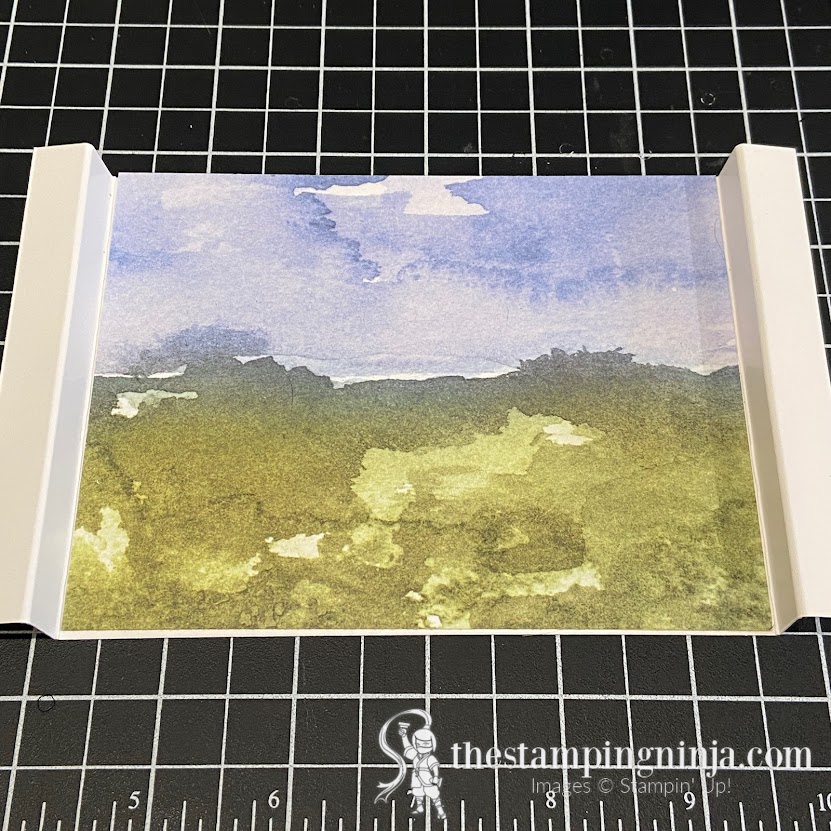
Time to stamp
- Stamp your bear in Soft Suede ink and two clouds (from Mountain Air) in Smoky Slate ink on a piece of Shimmery White cardstock.
- Using your Water Painter, lightly spread some of the ink to color the images. (hint – the clouds will require you to add a little more ink with the Water Painter to help give them some color.)
- Fussy cut the bear and crop the clouds with the Majestic Mountain dies using your Stampin' Cut & Emboss machine. (fussy cut means to cut out with your Paper Snips)
- Using your Stampin' Cut & Emboss machine again, crop six trees in Mossy Meadow cardstock. (hint – do not worry about getting all the little pieces out of the trees. They will add a little support if you leave some of them there.)
- Glue two sets of trees together using the Silicone Craft Sheet method. (hint – this doesn't have to be done but will give your trees some further support). Do this by laying the pieces upside down on your Silicone Craft Sheet, add some glue to the sheet (up in the corner and out of the way), dab a sponge into the glue, and lightly tap some glue on to the pieces. (Hint- this will ensure that your small pieces have glue on them, and you will not have to worry about globs of glue oozing out from your layers.) Once the glue is dry on your sheet, simply rub it off with your hand.
- Attach two trees (the non-doubled ones) and the two clouds to the New Horizons DSP using Stampin' Dimensionals. (hint – you will have to cut them smaller to fit behind the trees.)
- Adhere the two remaining trees to the inside of the top piece with the rectangle cutout using Multipurpose Liquid glue. Trim the ends off with your Paper Snips.
- Cut a piece of Window Sheet to measure 3/4″ x 2 1/2″ and adhere it to the back of the bear using Tear & Tape.

- Place a piece of Tear & Tape along the 1/2″ edges on the sides.
- Adhere the Window Sheet piece (attached to the bear) to the right side, about 1 1/4″ up from the bottom.
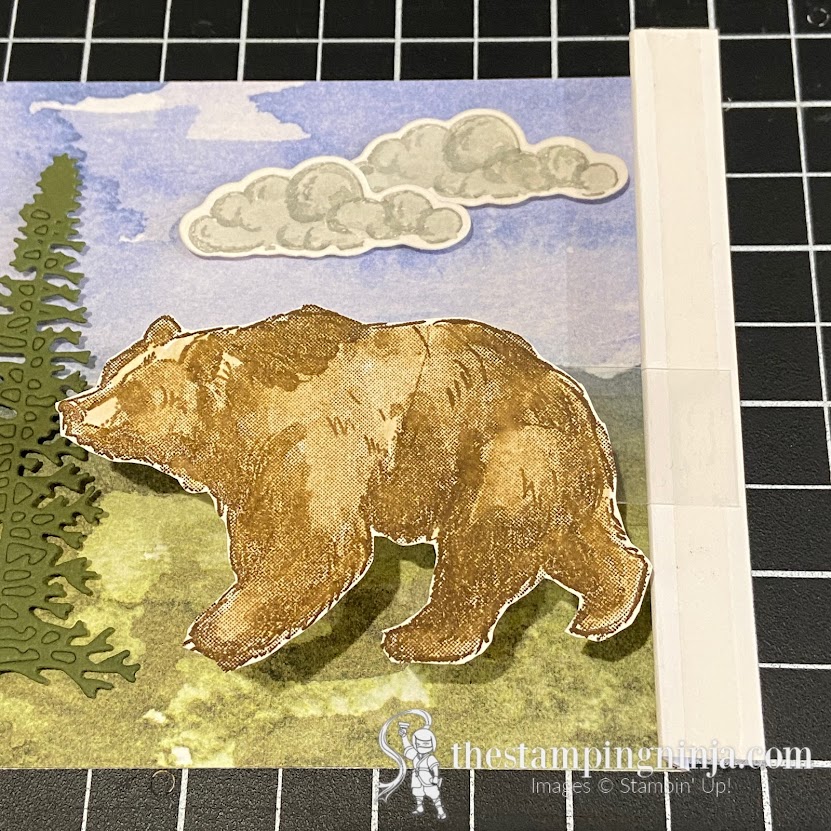
- Attach the top cardboard piece to the bottom cardboard piece, forming your diorama.
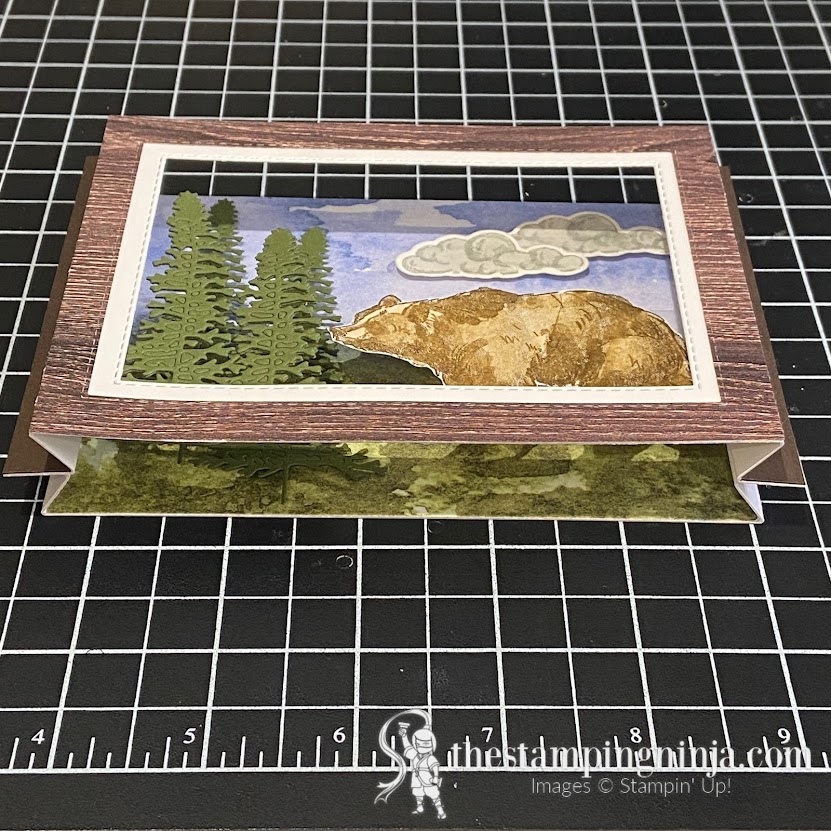
- Stamp your sentiment on a 3/4″ x 3 3/4″ piece of Early Espresso cardstock using Whisper White craft ink.
- Once the ink is dry, punch the right side with the Banners Pick a Punch and adhere to the front of the card using Multipurpose Liquid glue.
- For the back: Sandwich a 4 14″ x 5 1/2″ piece of Early Espresso cardstock in the Timber 3D embossing folder and run through your Stampin' Cut & Emboss machine.
- Using the Basic White rectangle that you cropped earlier, stamp your second sentiment in Early Espresso ink and the flower in Mossy Meadow ink.
- Layer and adhere the rectangle and the embossed piece and attach them to the back of the card using Multipurpose Liquid glue.

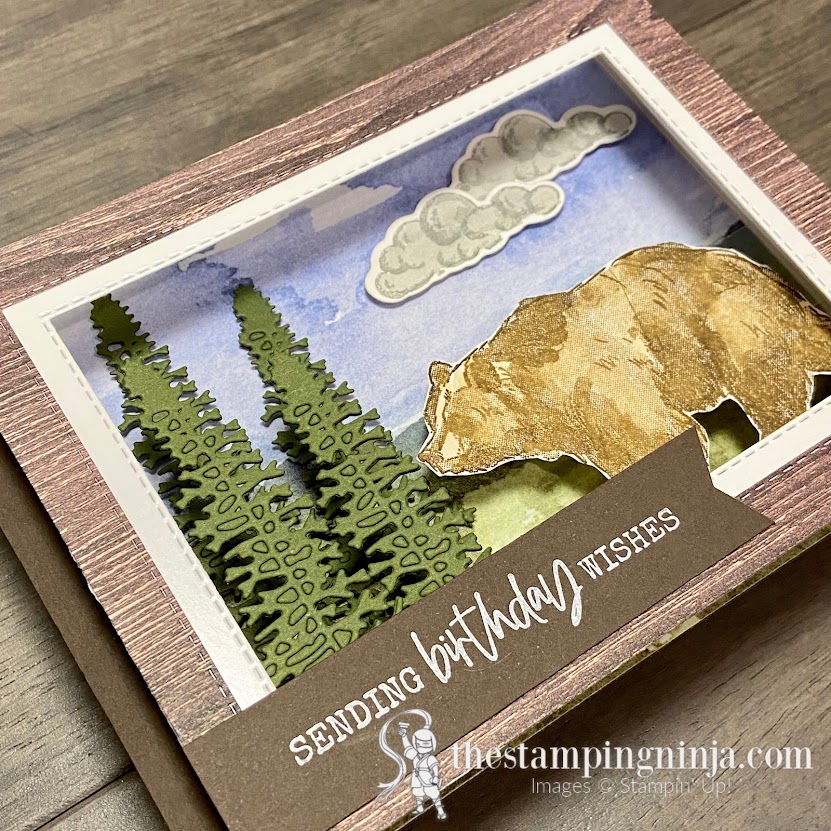
Isn't this card great? The best part is that it will fold up and fit in a regular size envelope.
Here is the original card from my friend Carole. I just adore it and it sits on the shelf in my craft room.
A complete PDF tutorial for the Wildlife Wonder Diorama card can be found by clicking on the button below.
Before you go
Since this is a fun fold blog hop, don't you just want to see more? I am sure that my other Pals have a great project for you. Be sure to check out their projects too! (see pictures below)
I would love to hear from you. Please let me know what you think of the Wildlife Wonder Diorama card for the Pals Fun Fold Blog Hop.

If you would like to purchase the supplies used to make the Wildlife Wonder Diorama card, you can click here or any of the photos below. When ordering, be sure to enter my monthly host code to take advantage of the Ninja Loyalty Rewards Program.

If you enjoyed this post, please be sure to…
- Sign up for my Newsletter and receive aFREE exclusive PDF Tutorial.
- Sign up to get blog posts delivered to your in box.
- Use this Month's Host Code on orders under $150 to earn your way to aFREE $50 shopping spree on me using the Ninja Rewards Loyalty Program.
- Shop and save the CLEARANCE RACK and PRODUCT BUNDLES.
- View My Gallery for more great inspiration.
- Follow me on PINTEREST, FACEBOOK, and INSTAGRAM.
Source: https://thestampingninja.com/wildlife-wonder-diorama-card-for-the-pals-fun-fold-hop/


0 Response to "Really Easy Wonder Book Diorama With Steps"
Post a Comment